
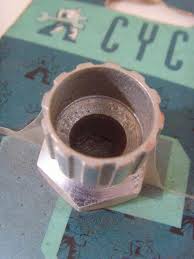
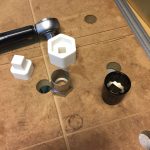
 As I was doing some maintenance of my bicycle, I tried to clean thoroughly the gears cassette. To remove it from the bike you need a special piece of metal that you can source from most bike shops called a hub key. When you dismantle the cassette you can use a normal wrench and simply unscrew the cassette. However when you put it back together, it is good practice to make sure that you tighten the whole thing to the right level of torque. In my case 20Nm. To do this, you would use a torque wrench. These come in different types with torque ranges that vary. In my case the torque wrench I have for the 20Nm, has a small 3/8inch or 9.5mm adaptor. Unfortunately the hub key, only comes with a large 27mm hex key. I tried multiple combinations of bit and pieces that I had in my toolbox, but nothing would work for this particular setup.
I then decided I could try to make a 3D printed adaptor that would fit my wrench and the hub key.
Hub Key
by technomupet67
on Sketchfab
I usually use Autodesk Inventor to design parts. However, I recently discovered a new online 3D CAD software which looks very promising. It is similar to Autodesk Fusion and Inventor but most interestingly it has full support for the IOS devices like Phones and Ipads. So you can design, update, change your designs on the go, as long as you have internet connection. This is OnShape.
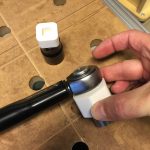
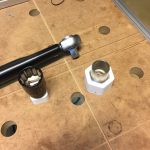
As you can see in the pictures, I managed to get the adaptor part printed and it works amazingly well. I used the Makerbot filament and printed with 50% density to trade long printing time and solid feel for the part. It prints in approximately 1h15 minutes and is very strong. I am always surprised by how solid the parts can feel despite being very light.
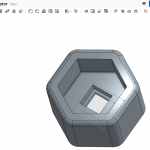
As I was playing around with the design, I went back and forth between Onshape and Inventor which I know better. I then realised, I could create the Hub Key itself in Inventor a not have an adaptor at all. Simply creating a Hub Key with the right dimensions to fit my torque wrench. I knew I would not be able to print it at home, as the design is intricate and also would require a lot more strength than the PLA filament can give. I created the part and then tried to upload it to I-Materialise to see how much it would cost me to have produced professionally in steel or titanium. It works around £30 for the Steel part and £130 in Titanium. Finally, I also created a universal adaptor to go from a 3/8inch to 1/2inch socket. You can probably buy one from the shops, but I did not have it in my toolbox.
When, I printed my design in PLA, I had to make 2 versions, as the dimensions vary slightly when you print precisely dimensioned parts. For example, something that would have a design specification in your 3D software of 9mm square hole, might come out at the end with a 8.5mm or 9.5mm true dimension due to shrinkage of the PLA as it cools. One day, it would be interesting to print such a part in Steel to find out if there is substantial shrinkage or not with the prints coming from a professional shop etc…
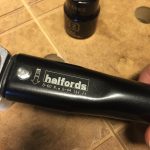
Also, there is probably the option of having the part cut at a CNC workshop. I have not idea, if this would be more or less expensive than 3D printing. In any case, it is still fairly expensive to print versus simply buying from Halfords bike shop…