 Just a quick post for savings my latest tips on how to make a piece of good bread at home.


1- Flour is critical.
- Want to make a baguette only T55 Flour will be good enough to reach crunch and structure. [Minimum should very very strong white flour].
- Good rustique bread with Cotswold Flour
I find the naming conventions extremely confusing, so I now use the PROTEIN content as the base for selecting which flour I want to use for the bread. For a very crusty bread use flour with high protein content. For a chewier pizza style bread use a lower protein content flour. Thanks to European rules, all flours have to display on the packaging the protein content.
- Bread Flour: 12-15% protein
- All-Purpose Flour: 10-12% protein
- Cake Flour: 6-8% protein
- Pastry Flour: 8-10% protein
- Italian ’00’ Flour: 7-9% finely milled/fine grind
- Italian ‘0’ Flour: 9-10% medium milled/medium grind
- Semolina Flour: 13% or more used to make pasta
-

- 14.9% Protein
-

- 14.0% Protein
-

- 11.5% Protein
-

- 10.5% Protein
2- Autolyse is not discussed in general (video) as a technique to make bread but my best loaves of bread have been achieved using the Autolyse method. Essentially it is mixing the ingredients without kneading. Some also delay the introduction of the salt into the dough. Using a large Tupperware container has delivered the best loaves of bread for me. You then fold the dough on itself like a portfolio and rotate 90 degrees. For high hydration loaves, make sure you wet your hands before so that they do not stick to the dough as you manipulate it. You should do this multiple (3 ideally) rises of 30 minutes before the final shaping rise. The dough should be stretchy and make a “window” when pulled apart. The dough is ready when if you push your finger on the dough and remove it, then it recovers only halfway through the push. Less it is not fermented enough, more it will collapse in handling/cooking.
3- Quantities of Flour/Water/Salt etc…are all percentages of the flour.
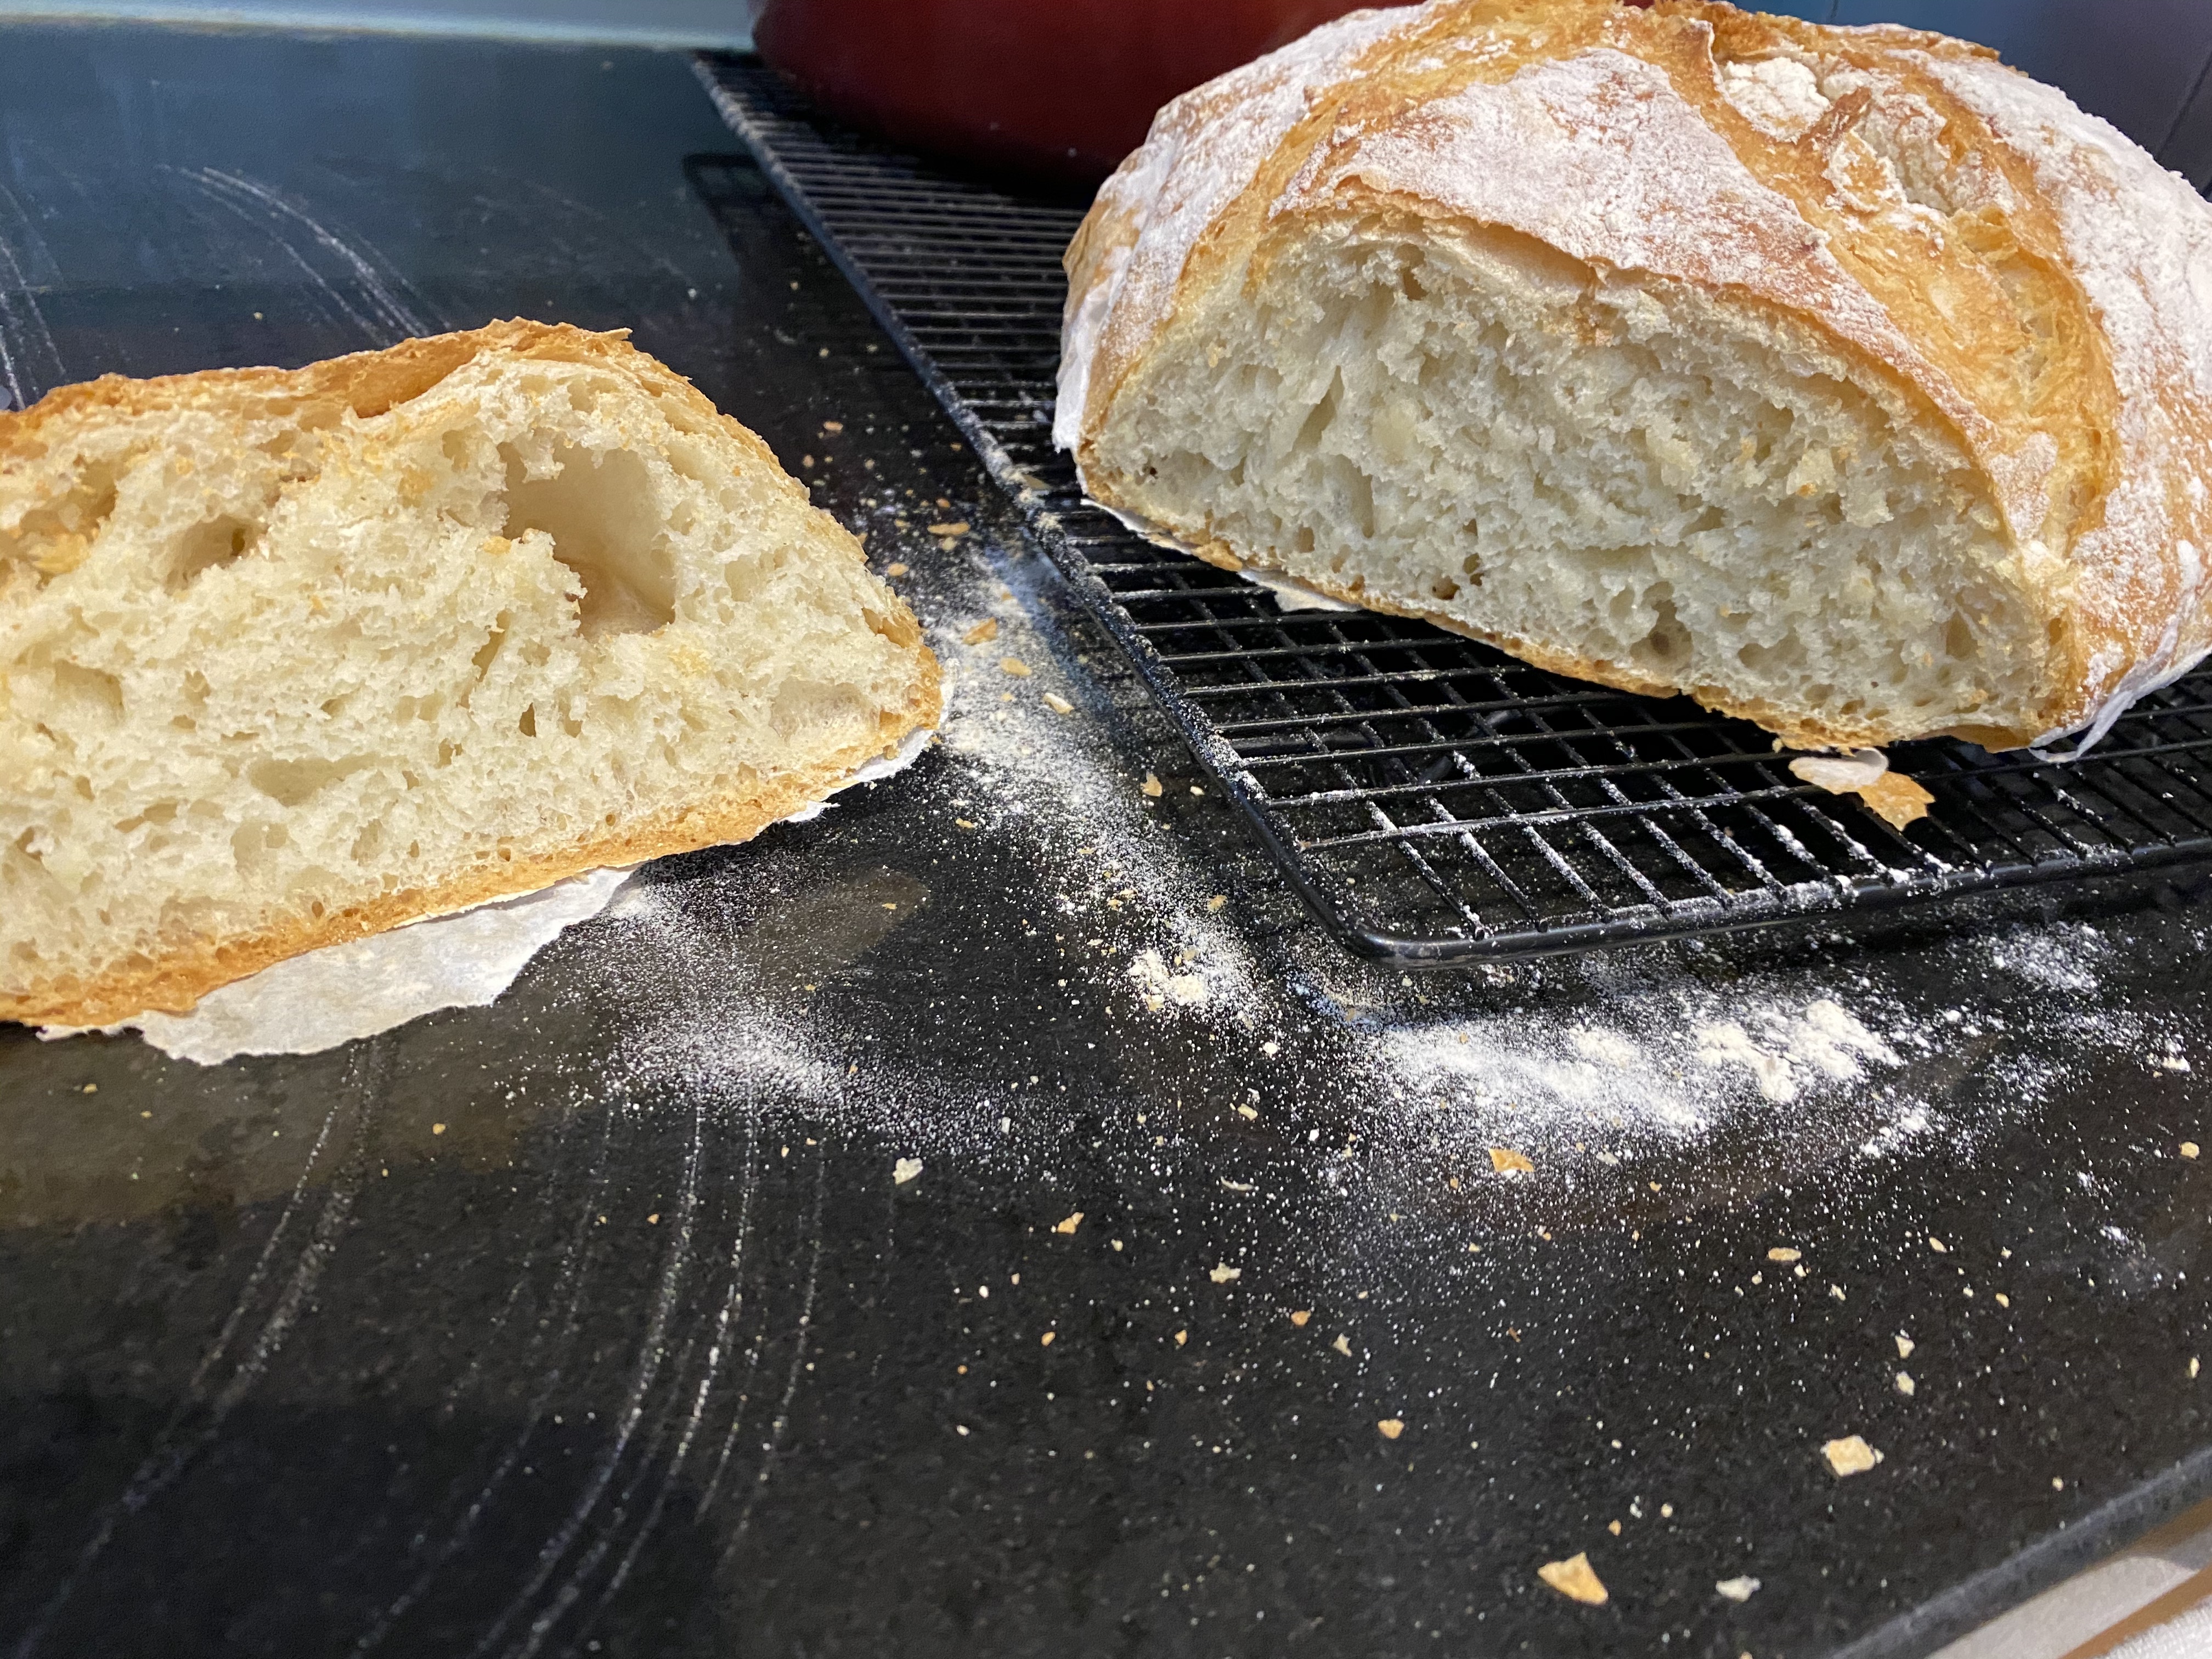
A 75% hydration bread means that the water is 75% of the weight of the flour. The higher the percentage of water the larger the holes in the final bread. The higher the water content the more difficult the dough is to manage for the final rise. (it might stick to everything). For flours with seeds or less refined flour or spelt flour, the % of water is usually higher. For general bread production, 70% to 80% of hydration is the range. Salt is nice at 2%. The picture of this blog is 75% water.
4- Quantities of yeast (as a percentage) only affect the speed of the rise, not final quality. More yeast is not better bread or better holes in the bread. 1% of Yeast is a good number. fresh yeast is usually 3X the quantities or dry yeast. Fresh yeast produces more active and faster rise. the more yeast the quicker the bread will be ready to cook but the quicker it will “over” ferment and collapse and therefore making it harder to spot the correct time to wait until cooking. A lower yeast content gives makes it easier to achieve the best bread because it is slower to develop.
5- Warm water and temperature of flour are important. Water can be warm (up to 35 degrees) and flour should be room temp. 25-26 degrees is the right average for all combined parts. Note that this is warm versus most people home’s room temperature of 19-20 degrees. Yeast is resilient and will live in low temperatures like the fridge but the rise is then slower, which might be what you need to fit within your schedule.
6- Shaping needs to be done by creating surface tension on the outside of the bread so that it rises and keeps its shape without going flat. I prefer to tuck the dough on itself until I get the surface tension. Do not use flour on the bread during shaping. If the dough is very wet and sticky use a metallic scraper to gather the dough off the tabletop or wet your hands rather than adding flour. Put your hands behind the dough and pull the dough towards you (the front part of the dough will get rolled under and create a tuck-in) keep rotating continuously the dough as you pull it towards you. This is a good way to create surface tension to hold the bread shape during the final rise. If rising in a banneton, then flour the banneton generously with “RICE” flour. This is because RICE flour will not combine with the wheat flour and will prevent sticking to the cloth in the banneton. Put the bread upside down in the banneton. (ie the top of the bread will have the banneton circles).
7- After the final rise, generously cover the dough with flour and then make the opening cut with a razor blade / grignette. You can cut deep; It will help the bread to open up. Note that the “Angle” of the cut will make a “HUGE” difference in the way the bread will look after cooking. A very straight and square cut will simply open the bread, whereas an angled cut will create a “flap” or “ear” which is characteristic of French loaves of bread like a baguette.
8- Levain or Sourdough starter can be done on the same day and delivers the best-tasting loaves of bread but not necessarily the best-shaped loaves of bread. Multi-day sourdough starter is great but not necessary for texture. I use 50% water / 50% flour for my starters. Use an elastic band to measure the progress of the rise around the jar. If the sourdough starter has risen more than 2 times its original space, it should be ready for the bread rising. Sourdough starter will float in water if ready to be used. When a starter collapse after its rise, it is time for a feed of fresh flour and water. Again, I use 50% flour and 50% water to keep things easy and avoid weighing the starter every time.
9- A large Dutch Oven is the best cooking method to deliver crispy crust and oven puff without having to worry about steam in the oven and other complicated methods of cooking in the oven. I put a little bit of flour in the bottom of the Dutch oven to prevent the bread from sticking to the bottom. However, it never happened to me for the bread to stick to the pot. I put the Dutch oven at least 30 minutes before cooking in the oven so that it is very warm when I put the dough in the pot. If you do the final rise of your loaf on a sheet of silicone, then you can simply move the whole thing into the dutch oven, reducing the risk of collapse of the risen loaf.
10- The oven needs to be very warm. 230 degrees or 250 degrees. My loaves of bread are usually cooked within 35 minutes (20 Minutes in the Dutch oven at 240 degrees followed by 15 minutes in the oven at 200 degrees). It is possible to make them go darker by taking the lid off the dutch and leave in the oven for a few more minutes. The final trick is to leave bread out of the pot but in the oven and let it cool down in the oven slowly. (for 20 minutes but not more as it would dry the bread too much). This makes an extra crispy crust but will make the bread dry quicker over the coming days.