I am continuing my experiments with spices and cooking temperatures, as well as with methods such as sous vide or slow roasting, etc…
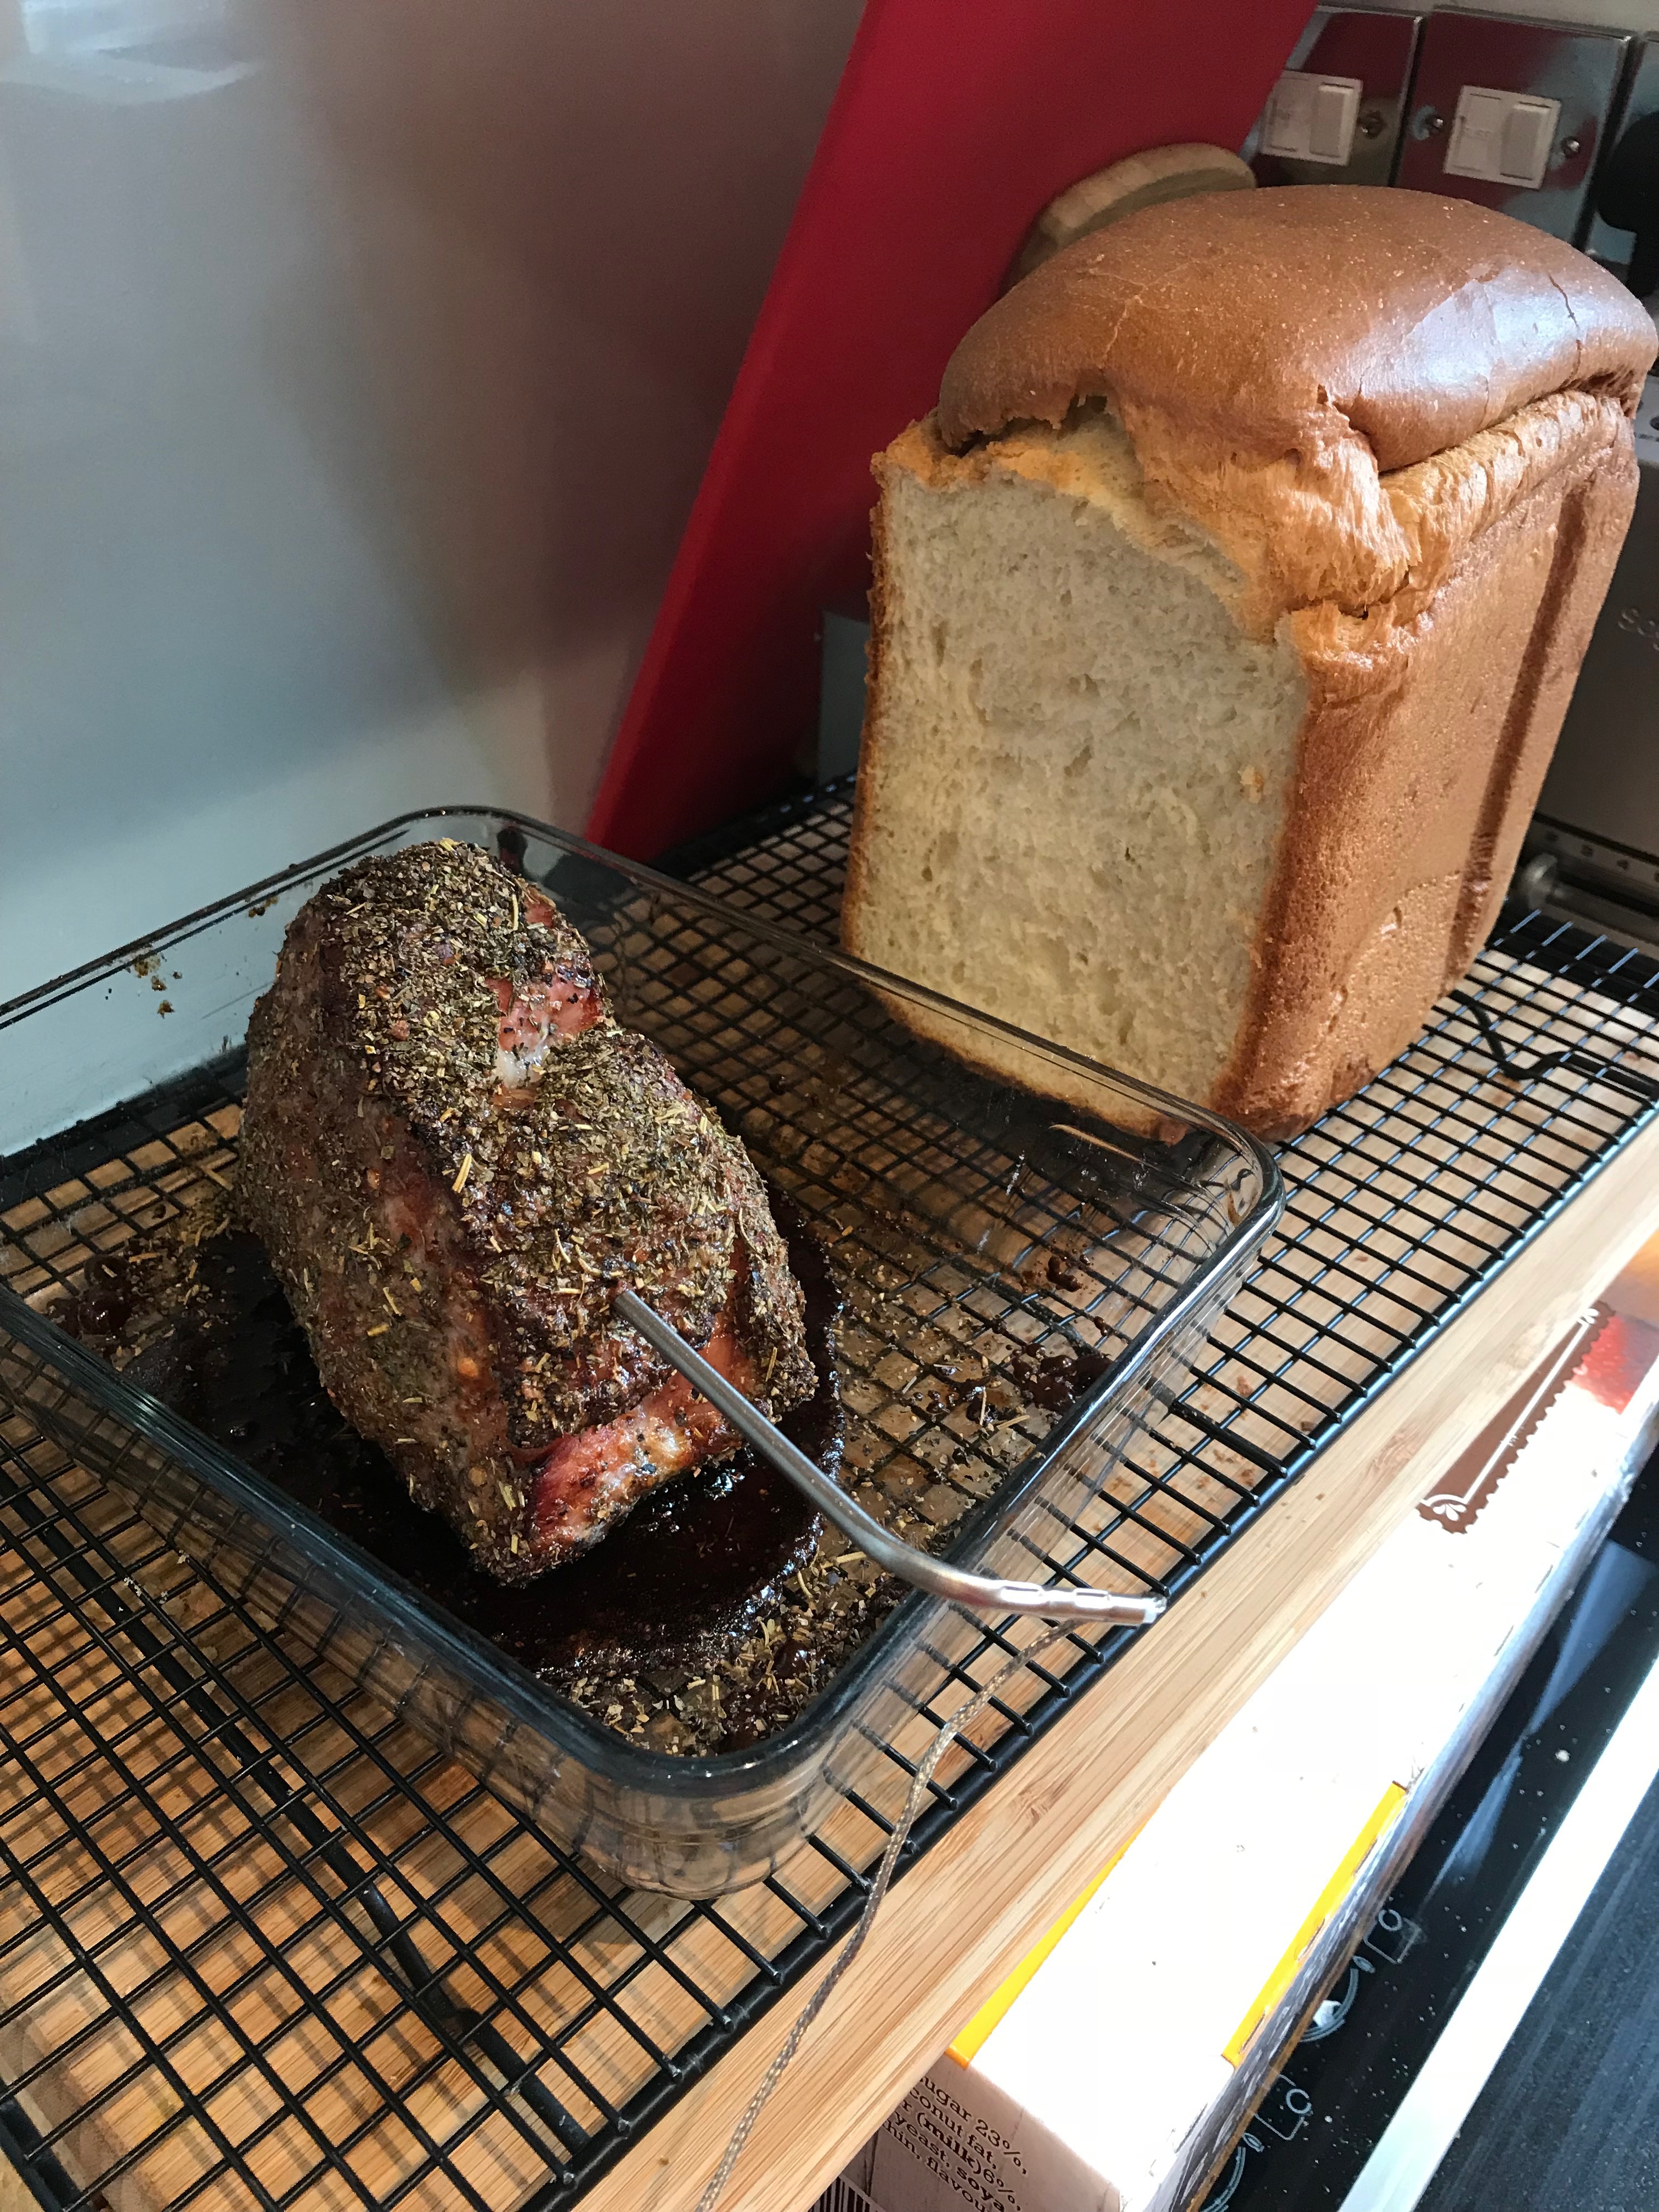
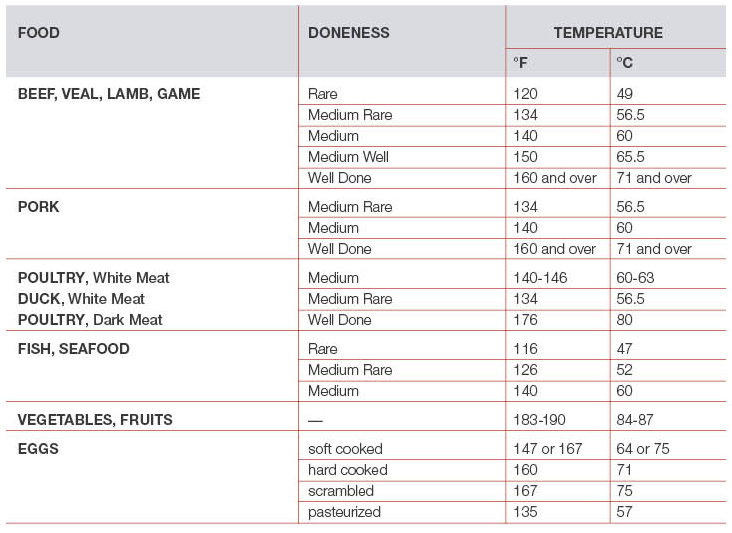
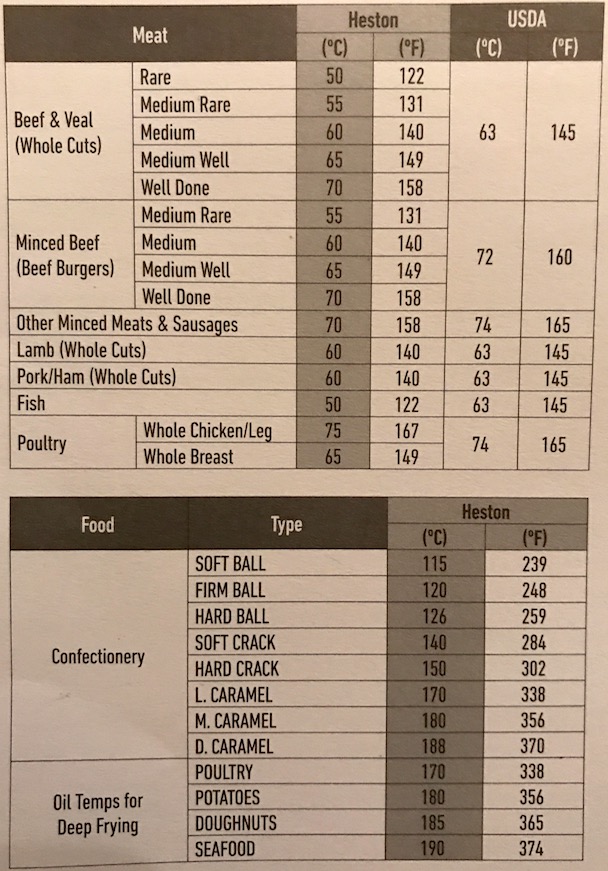
Latest is normal roast in the oven with a temperature probe inside the ham to check “when” it is done rather than relying on weight etc…Target temperature was 63 Celsius.
Interestingly, once the ham was removed from the oven, the temperature continued to rise for a little while. As a consequence, a 63 degrees Celsius in the oven ends up being more like 65/66 once out. This is very different from sous vide cooking, which only cooks at a single temperature.
In the oven, the “180 degrees” outside of the ham slowly makes their way to the centre until the centre is at 63 degrees. [Update: After several experiments, I have found that it is better to have a lower oven temperature to let the heat enter the meat more slowly. So 140-160, depending on how fast you want to go. Also, it is VERY IMPORTANT to desalinate the ham in a bowl of cold water overnight to prevent it from becoming too salty.
In sous vide, the whole ham will cook evenly to 63 degrees.
This ham was coated with spices and 2 tablespoons of brown sugar. Delicious…