New Project

Need a new project….thinking of doing something like this…It is a small stainless steel ball which appears to roll magically over sand and leaving nice patterns in the sand like to some Japanese Zen garden techniques. It is like a frame with a concealed robotic arm to drive a magnet moving the ball from below the sand.Japanese Sand Gardens - www.japaneseflowergardens.weebly.com

Will document over the next few weeks how I am progressing and what I am doing. Given it is computer controlled, I envisage to place a stone in the sand as well and make sure the ball can avoid it.

I obviously, there is a fair amount of internet browsing.


been doing some research and found this

https://www.geogebra.org/

and this

https://www.geogebra.org/m/uxc2G78E

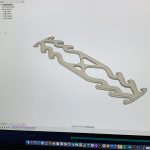
need to start with some design in Fusion 360….

More research :


Posted in Coding, Electronics, Home Life, Laser | Leave a comment

Virus Simulator

With the home confinement imposed by the epidemic of the COVID-19 virus, I have been doing many projects that I had on hold for long. But also started new ones…

I saw a nice explanation of the impact of containment on the spread of the virus through the population and the potential impact on the health services and the level of mortality etc…

I thought that I could make some sort of display frame and build a simulator.


It is an electronics build but the actual coding of the simulator has been more of a challenge. In particular, creating a model that is simple enough so that the display is fluid and give an impression of true virus spreading etc…

This is interesting: try

The current system creates a random population of people (pixels) scattered across the 4 panels of 64 by 64 leds. The system picks randomly a level of containment (or none), and a level of agitation of the people moving across the display. These are blue pixels.

The computer creates an initial load of viruses across the population randomly. Between 5 and 10.

If the people with the virus get in contact with a pixel that is not sick, then there is contagion and the new person can infect others.

There is a lifetime for the disease and a mortality rate. If a person survives the virus, they are then immune but only for a certain amount of time. This creates waves of disease spreading across the screen.

At the top of the display, there is a graph that shows the number of people sick in the population. This clearly shows the curve of the evolution of the disease. Sometimes the peak is very sharp and sometimes the peak is only a small bump.

The system tracks the time it takes for all the sick people to either die or recover. Once there are no sick people anymore, the system re-starts a new simulation with new parameters picked randomly within boundaries.

The system also tracks the parameters that result in the longest disease time, the shortest disease time, the hight death ratio and the lowest death ratio.

In general, it takes between 1 to 6 minutes to run a single simulation. This one is about 3 minutes.

So far I have been able to observe that the longest disease is when there is a high level of containment. It also reduces the level of mortality but not as much as I expected. I tend to spread the disease over a longer time period.

As per the above, the shortest simulation was 31 seconds with a starting population of 1600, an initial virus load of 12 viruses, as disease life of 45 cycles and an immunity life of 70 cycles, with no containment at all. This resulted in a 54% death rate.

Clearly this is not a scientific experiment but just a toy display. I am very please with the simulation effect which gives a good sense of a disease spreading through a population.

It is made with a Raspberry Pi running a version of Linux. It is programmed in Python.


Posted in Home Life | Leave a comment

End of Week 1- Coppa Corona

Time for me to check on my Corona-Coppa… started this a week and a half ago. It is a piece of pork shoulder which I have started to cure about 10days ago.

I salted the meat with Kosher salt for 1 day and 1 night in the fridge. I then washed thoroughly and dried it very well.


Then I took some black pepper and blitz to a coarse crush. Covered the meat on all sides and simply left in the open air within the fridge.

I am checking on the meat regularly and turning it from one side to the other to ensure that the moisture is not accumulating anywhere. It is important for the meat to stay dry to prevent any bad bacteria or mould to start growing on the meat.

So far so good.

I can allow myself a glass of red to get me waiting …..


I need to wait until the meat is 65% of whatever it was when I started…which could be 8 weeks…

I wish I had measured it at the start….

oh well….

will simply have to wait until I cannot resist the urge to tasting it…


I am also ready for a weekend treat with a nice milky-bread bun. It is a recipe from one of my nieces (Benedicte) with who I exchange recipes regularly!

Will document this recipe properly very soon…

Posted in Cooking, Home Life | Leave a comment

Same Place different soul

Since we are now on confinement and only allowed to go out alone and for essential reasons, I cannot go out on a ride with the motorbike beast.

So I converted my authorised sports activity to be a cycling ride to the same location but this time I was accompanied by Philippe who also passed away last year in February. He was a keen cyclist and the weather made us both happy this morning.

30KM cycling even with the electric bike is still a good exercise for the body and the soul.

Posted in Home Life | Leave a comment

Oli-Cookies

In a continuation of the survival to virus series….here is an essential recipe for keeping the moral on a high.

It is an international recipe with Belgian Sugar, French  Butter and Pralin, Swiss Chocolate, English eggs, Canadian Flour…probably could stretch the baking powder to be Irish.

Expect sugar rush and nice smell in the house.

Undercook for chewiness. (15 minutes)

Crispy cook. (20 minutes)


Ingredients :

  • 150g of Butter (softened)
  • 150g Cassonade or light brown sugar. (beetroot based if possible)
  • 100g Caster sugar
  • 2 sachet of vanilla sugar or a 1.5 teaspoon of vanilla extract
  • 1 egg
  • 240g of plain flour
  • 1 sachet of levure Chimique or 1 teaspoon of baking powder
  • 1 Tablet of dark chocolate 100g (with Salt) or add salt to the recipe
  • 100g of “Pralin”. ( hazelnut sugar-coated — see pictures)

How to Make:

  • Mix butter and all sugars with a mixer. Medium speed to get a soft, lightly coloured mixture.
  • Add the egg and mix again.
  • Add the flour and mix to a soft dough. (probably manually)
  • Break the chocolate in small pieces and add to the mixture with the Praline.
  • Roll the dough into a long sausage shape
  • Cut pieces to make cookies and put on a silicone sheet or baking tray.
  • Put into oven for 15-20 minutes at 180 degrees celsius. (Enjoy the smell in the house, think about your childhood etc….)
  • Cool down on a rack….eat with ice cream, and-or coffee.


Posted in Cooking, Home Life | Leave a comment

Just before confinement…

It is a bit more than a year that Guy left us. So much has happened since and the recent events are putting a lot of things in perspective.

Decided to take Guy on a motorbike ride with me today. He loved his motorbike and I know he was looking after me as I was getting back on the wild animal…with a 1.2L engine, 4 parallel carburettors, a V-Boost compressor, a shat-drive, 145 Horsepower, a loud puffing noise…

On many occasions, I have considered selling it. My brain says, I only do a few miles per year and it is costing me taxes, MOT and insurance, it is dangerous. My heart says… NEVER…. love it too much. The thrill and adrenaline always put a smile on my face. It reminds me of good times and brings them to the present.

As I come back home the prime minister just announced the full lockdown of the UK for the foreseeable future…I am glad I followed my instinct to do it “now” and not tomorrow.

Life is too short to wait for the right time just do it now.


Posted in Home Life | Leave a comment

Stay Calm


Staying home does not feel like fighting an enemy or being brave as the invisible threat invades our hospitals.

Made this small incent burner from Japanese inspiration, trying to find the much needed inner calm that we all want at the moment.

It is a great time to reflect on what is important in life, how hard it is for others that we tend to forget in our rushed city lives. A few months of rationing will never compare to a lifetime of struggle to find food or fight wars and diseases.


Posted in Home Life, Laser | Leave a comment

Survival skills #1 – Bread Making

A family fun thing, I was challenged by a brother in law to explain my bread recipe in a short video…

Here you go: Video link


Good health to all.

Posted in Cooking, Home Life | Leave a comment

Word Clock

Yes, that is right, not a world clock, a word clock.

It tells the time in English…

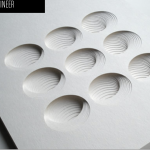
Made it all from scratch using online inspiration, in particular, the faceplate.


I saw this first online a long time ago and then at Selfridges more recently, it reminded me that I must build one for myself. Various versions of this are sold for an enormous amount of money (£1000-£2000), there is much satisfaction in building one yourself.

The code is a copy and pastes from a version I found online. The box is made from scratch using Fusion360 and my laser cutter. I made 4 different iterations before getting to the right dimensions and hole alignment etc…this is the latest. Not 100% perfect but nobody will notice except me. Will do one last version…it is my OCD.

It is made of a Trinket 5V controlling a matrix of NeoPixels and the time is kept accurate using a Real-time Clock communicating to the Trinket using I2C protocol. The time is kept in memory in case of power cut through a small button battery.

As usual, it took me forever to get this project done…I bought the part almost a year ago exactly!
When I started this blog in 2012, I already had some interest for “time” in general. (As per the tag line ) Why do some people manage to do more things than me with the same amount of time as me? How can somebody become a president within 50 years and others struggle to do their tax returns on-time?

Why is there no “pause button” (that would be super cool) for time? [some science why]

When I was still working, I used to tell my team:
“Enjoy today like if it was the good old days……. because it is!”

Recently, I feel that time is taking me through life quicker than I would want it to. Seeing time as words rather than a running set of numbers or a needle counting seconds gives me a bit more peace to enjoy “now” as a dear friend used to tell me.


Posted in Home Life | Leave a comment

Just another Friday !

Friday


Posted in Home Life | Leave a comment

Les Olives de Gilles et Chantal

At last Gilles et Chantal are over to visit our house and to discover London…last visit was probably when Jules was born so close to 20 years….


Because I cannot find “Lessive de soude” (a 30% Caustic Soda or Lye mixture). I am trying to use Baking Soda which is also a higher PH.

Lessive de soude at 30% (as you purchase the liquid bottles in France) is usually PH14.

Baking Soda of 3 Table Spoons in 500ml of water PH9.5 (I have measured this ). So I am using that to take the bitterness out in the initial soak.


Posted in Home Life | Leave a comment

Bike fitting

A quick post to record how to set up a mountain bike for a good fit.

This link is a good explanation.


Posted in Home Life | Leave a comment

Happy Valentine !

Posted in Home Life | Leave a comment

Absolutely Love this – Boston Dynamics

When I saw the first digital camera from Canon, I thought it was the future and wanted one immediately. It was clunky, saving files on a micro floppy disk at resolutions that were sub-par, etc….but I knew it would one day become something like we have in our iPhones, always with us, amazingly powerful etc…

Today, I see the same future for the technologies from Boston Dynamics…I wish I could live in the future now but without having to get old…can’t wait.

See the video here.

Posted in Coding, Electronics, Home Life | Leave a comment

2020 is a Leap Year

In 2020 we have one extra day to do “something”….given the state of our planet I will use this extra day to try to improve my CO2 footprint.

In 2018 we got rid of the petrol car and went full electric with the Tesla. In 2019 we installed solar panels.

But when you look at the below graphic it seems that there is still a lot to do and clearly changing our diet to a more plant-based diet should be part of the master plan. (by the way I recommend watching this…)

As I was browsing the internet to better understand how we “capture” CO2, I realised that there is almost “NO” solution other than planting trees…..which seems such a low tech solution and inefficient in terms of returns.

To illustrate the lack of technology to absorb the CO2, it would take 1 cubic meter of porous basalt (ie a rock of 1m by 1m by 1m) a full year to only “absorb” 0.5KG of Co2 from the atmosphere.

We challenged our friends in our yearly “New Year Wishes”  video to do something about the environment.

To fulfil my commitment, I am currently researching some sort of carbon capture device that I could build at home similar to this thing. I would love to work with these people….they seem to be having a lot of fun.

Posted in Home Life | Leave a comment

Solar Tracker

A simple Raspberry Pi tracker for Solar and Tesla Battery Here.


Posted in Coding, Home Life | Leave a comment

Crispy Pancetta Bacon

This is very easy to make ….the most difficult is to wait for a few weeks so that it is ready to be sliced and cooked to crispiness heaven.

It is just a piece of pork belly which you cover with sea salt or Kosher Salt. It is best to use the coarse chunky salt (to avoid end product being “too salty”) but both work.


Leave the pork belly on a layer of salt and cover the belly with salt as well. Leave in fridge for 24 hours.

Take the pork out of the fridge and clean thoroughly and DRY very well using kitchen paper towels.

Cover the pork with the spices you like. I used black pepper, paprika, cayenne pepper and a little bit of herbs de Provence.

Put a string through the meat and hang in the fridge so that it starts drying and preserving. After a couple of weeks, the meat should not be wet at all and can be kept in a Tupperware or even outside of the fridge to air dry. (As long as you protect the meat from getting spoiled by bugs).

I like it best once it is about one month old. Obviously you must monitor the meat for any signs of spoiling, but if you have salted properly in the first step it should be fine.

Slice very thinly and cook in a pan until crispy.

Great as an aperitif with a beer or in pasta or with waffles for breakfast!

Posted in Cooking, Home Life | Leave a comment

Went to see my mate


It was Darren Hooker’s anniversary of his passing recently (22nd January 2016) and unfortunately, another one of my work colleagues (Paul Foster) has gone to join him upstairs only a couple of weeks ago.

The last time I saw Darren we met at the Crown and Treaty for a last beer and say goodbye to each other. He was tough and kind at the same time, a very special person that I am very happy to have met and called my friend. I miss him but nothing like his family does.

Paul loved the CAT as well and I had a few beers and parties with him over there. I knew Paul for something like 20 years of my 26 years at Xerox. The scary thing is that when I met Paul he had already done 26 years of Company !!!….yes 46 years in Total. He was a character that everybody loved.

I remember that when I left Xerox and walked to all the desks to say goodbye to people the only desk where I got emotional was when I saw him and he said it was the wrong way round for me to go before him…

Although it is very sad that he will not be able to enjoy a long retirement which he definitely deserved, Xerox was everything to him and many of us loved him very much like family.

I like to think that Darren is showing his old mate Paul the best places up in the heavens.


Posted in Home Life | Leave a comment

Waffles not as easy as it sounds…

[Original Post was 18th Feb 2019]

This is how you make waffles…

If you are not using these recipes you cannot be making the true traditional recipes


The Brussels ones

The Liege ones

Latest update !! July 2020 :

After many attempts at making the best Waffles in the world, I have settled on my “Mum’s” recipe….not a surprise really as it brings so many memories in my mind. These a light and crispy, exactly as I prefer them.

A picture of the recipe is below but I tend to make a smaller batch at week-ends and for reference wanted to provide the quantities of the ingredients on my blog.

Ingredients:

  • 3 eggs yokes
  • 3 egg whites, hard peaks. (3 to 4 minutes high speed)
  • 250g Flour. I use the Canadian Strong white flour
  • 100g Melted Butter (1-minute microwave but with a cover to avoid splashes!)
  • 375ml warm Milk (1minute in the microwave)
  • 6g of dry yeast diluted in a bit of warm water

Mix all ingredients until smooth mixture, add the milk slowly so that you do not make lumps in the dough,  leave the mixture to rise for at least one hour.

Voila, the best Waffles ever!


Below is the quick version which does not require a rise period.

However, there is salvation for a quick substitute version for when you simply do not care of having the true recipe and simply want Waffles quickly!

Ingredients (probably 12 waffles):

  • 6 eggs
  • 500g Flour
  • 100g Maizena (Corn Flour)
  • 200g Butter
  • 500ml Milk
  • 400ml / 500ml Cold Water (depending on how light you want the waffles)
  • 4 packs of Vanilla Sugar
  • 2 packs of Levure Chimique (Baking Powder)
  • 2 pinches of Salt


How to Make :

Melt all the butter in a pan and let boil for a few minutes. (Get a blonde butter but not brown)

Put all the dry ingredients in a large bowl. Make a well in the middle.

Incorporate the milk and water into the dry ingredients by mixing with a fork.

Beat all the eggs in a separate bowl. Then incorporate into the above mixture.

Finally, add the melted butter into the mixture. Make sure the butter is not too hot so that it does not cook the eggs.

Voila! The mixture is ready to be used with your waffle maker.

Have been experimenting with this recipe and more water makes the waffles more crispy and light. I want to try with fewer eggs and also try with more sugar or cassonade sugar. I also want to try with splitting the yoke and whites and bringing the whites to soft peaks, etc…


Here is the perfect waffle maker…reassuringly expensive. Got this one for a few weeks now, and definitely the best I have ever used.

[Update 1: Just been to my mum’s….and got the secret recipe from Grandma…]


Update 2, following a visit to family in Belgium, got this recipe for the Liege Waffles. Need to try this one urgently in 2020!

Ingredients updated after a few tries :

  • 2 eggs
  • 375g Flour
  • 150g Butter / Melted
  • 100g of “Perles de Sucre” (large sugar)
  • 220ml Warm Milk
  • 2 packs of Vanilla Sugar (maybe even 3)
  • 1 pinch of Salt

How to make :

  • Put Flour, Salt and Vanilla Sugar in a bowl, make a well
  • Add eggs
  • Add yeast diluted in milk
  • Mix for a few minutes
  • Keep above dough for 30 minutes to rise a bit
  • Add melted butter and sugar pearls
  • Mix a bit a let rise for 1h (or overnight in the fridge)
  • Cook with the Waffle maker.


Original Recipe from Emmaelle  below :

UPDATE 3 !!!! – Below is the recipe used by my cousins in Canada directly from “Colette Ansseau”, one of the daughters of the sister of my grandmother !….This is the grandmother that married the brother of her sister’s husband…;) All true!

Posted in Cooking | Leave a comment

Bread Making – Top 10 tips

Just a quick post for savings my latest tips on how to make a piece of good bread at home.


1- Flour is critical.

  • Want to make a baguette only T55 Flour will be good enough to reach crunch and structure. [Minimum should very very strong white flour].
  • Good rustique bread with Cotswold Flour

I find the naming conventions extremely confusing, so I now use the PROTEIN content as the base for selecting which flour I want to use for the bread. For a very crusty bread use flour with high protein content. For a chewier pizza style bread use a lower protein content flour. Thanks to European rules, all flours have to display on the packaging the protein content.

  • Bread Flour: 12-15% protein
  • All-Purpose Flour: 10-12% protein
  • Cake Flour: 6-8% protein
  • Pastry Flour: 8-10% protein
  • Italian ’00’ Flour: 7-9% finely milled/fine grind
  • Italian ‘0’ Flour: 9-10% medium milled/medium grind
  • Semolina Flour: 13% or more used to make pasta

2- Autolyse is not discussed in general (video) as a technique to make bread but my best loaves of bread have been achieved using the Autolyse method. Essentially it is mixing the ingredients without kneading. Some also delay the introduction of the salt into the dough. Using a large Tupperware container has delivered the best loaves of bread for me. You then fold the dough on itself like a portfolio and rotate 90 degrees. For high hydration loaves, make sure you wet your hands before so that they do not stick to the dough as you manipulate it. You should do this multiple (3 ideally) rises of 30 minutes before the final shaping rise. The dough should be stretchy and make a “window” when pulled apart. The dough is ready when if you push your finger on the dough and remove it, then it recovers only halfway through the push. Less it is not fermented enough, more it will collapse in handling/cooking.

3- Quantities of Flour/Water/Salt etc…are all percentages of the flour.
A 75% hydration bread means that the water is 75% of the weight of the flour. The higher the percentage of water the larger the holes in the final bread. The higher the water content the more difficult the dough is to manage for the final rise. (it might stick to everything). For flours with seeds or less refined flour or spelt flour, the % of water is usually higher. For general bread production, 70% to 80% of hydration is the range. Salt is nice at 2%. The picture of this blog is 75% water.

4- Quantities of yeast (as a percentage) only affect the speed of the rise, not final quality. More yeast is not better bread or better holes in the bread. 1% of Yeast is a good number. fresh yeast is usually 3X the quantities or dry yeast. Fresh yeast produces more active and faster rise. the more yeast the quicker the bread will be ready to cook but the quicker it will “over” ferment and collapse and therefore making it harder to spot the correct time to wait until cooking. A lower yeast content gives makes it easier to achieve the best bread because it is slower to develop.

5- Warm water and temperature of flour are important. Water can be warm (up to 35 degrees) and flour should be room temp. 25-26 degrees is the right average for all combined parts. Note that this is warm versus most people home’s room temperature of 19-20 degrees. Yeast is resilient and will live in low temperatures like the fridge but the rise is then slower, which might be what you need to fit within your schedule.

6- Shaping needs to be done by creating surface tension on the outside of the bread so that it rises and keeps its shape without going flat. I prefer to tuck the dough on itself until I get the surface tension. Do not use flour on the bread during shaping. If the dough is very wet and sticky use a metallic scraper to gather the dough off the tabletop or wet your hands rather than adding flour. Put your hands behind the dough and pull the dough towards you (the front part of the dough will get rolled under and create a tuck-in)  keep rotating continuously the dough as you pull it towards you. This is a good way to create surface tension to hold the bread shape during the final rise. If rising in a banneton, then flour the banneton generously with “RICE” flour. This is because RICE flour will not combine with the wheat flour and will prevent sticking to the cloth in the banneton. Put the bread upside down in the banneton. (ie the top of the bread will have the banneton circles).

7- After the final rise, generously cover the dough with flour and then make the opening cut with a razor blade / grignette. You can cut deep; It will help the bread to open up. Note that the “Angle” of the cut will make a “HUGE” difference in the way the bread will look after cooking. A very straight and square cut will simply open the bread, whereas an angled cut will create a “flap” or “ear” which is characteristic of French loaves of bread like a baguette.

8- Levain or Sourdough starter can be done on the same day and delivers the best-tasting loaves of bread but not necessarily the best-shaped loaves of bread. Multi-day sourdough starter is great but not necessary for texture. I use 50% water / 50% flour for my starters. Use an elastic band to measure the progress of the rise around the jar. If the sourdough starter has risen more than 2 times its original space, it should be ready for the bread rising. Sourdough starter will float in water if ready to be used. When a starter collapse after its rise, it is time for a feed of fresh flour and water. Again, I use 50% flour and 50% water to keep things easy and avoid weighing the starter every time.

9- A large Dutch Oven is the best cooking method to deliver crispy crust and oven puff without having to worry about steam in the oven and other complicated methods of cooking in the oven. I put a little bit of flour in the bottom of the Dutch oven to prevent the bread from sticking to the bottom. However, it never happened to me for the bread to stick to the pot. I put the Dutch oven at least 30 minutes before cooking in the oven so that it is very warm when I put the dough in the pot. If you do the final rise of your loaf on a sheet of silicone, then you can simply move the whole thing into the dutch oven, reducing the risk of collapse of the risen loaf.

10- The oven needs to be very warm. 230 degrees or 250 degrees. My loaves of bread are usually cooked within 35 minutes (20 Minutes in the Dutch oven at 240 degrees followed by 15 minutes in the oven at 200 degrees). It is possible to make them go darker by taking the lid off the dutch and leave in the oven for a few more minutes. The final trick is to leave bread out of the pot but in the oven and let it cool down in the oven slowly. (for 20 minutes but not more as it would dry the bread too much).  This makes an extra crispy crust but will make the bread dry quicker over the coming days.

Posted in Cooking, Home Life | Leave a comment